Linking JunOS authentication to Active Directory using RADIUS
This post shows how to create two roles in JunOS: ‘read-only’ and ‘super-user’ and to give AD users access to these roles via groups. The Juniper vendor-specific information comes from here: http://www.juniper.net/techpubs/software/junos/junos94/swconfig-system-basics/configuring-juniper-networks-vendor-specific-radius-attributes.html
The Windows Server 2008R2 bit (server IP address 10.233.0.52):
1. Add the “Network Policy and Access Services” role, and the “Network Policy Server” role service. Then start the “Network Policy Service” MMC snap-in.
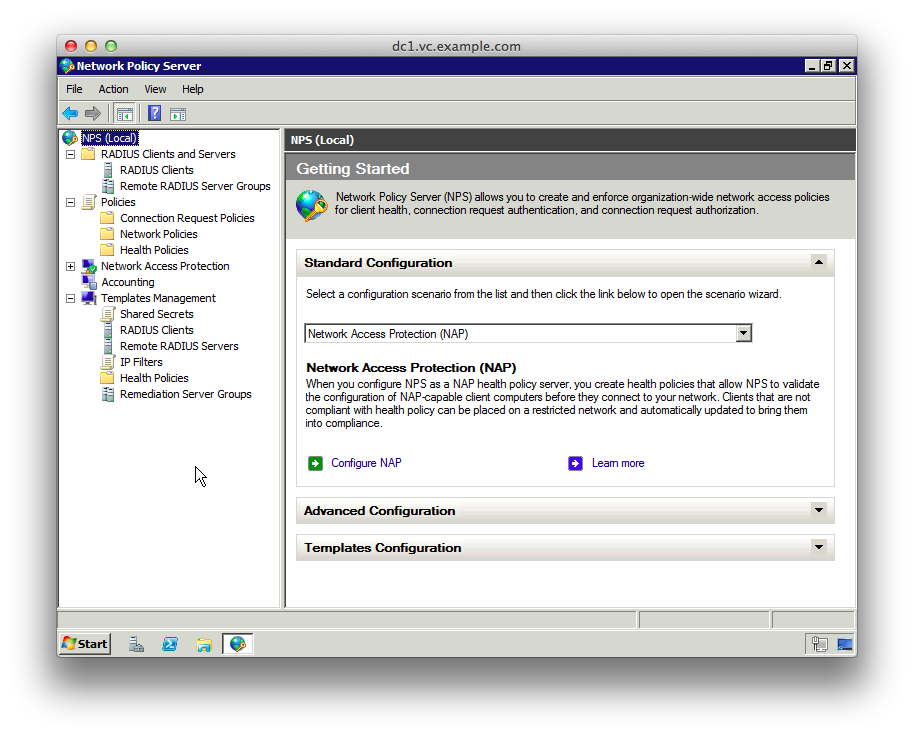
2. Select “Templates Management”, right-click “Shared Secrets” and select “New”.
3. Give the template a name like “JunOS”, select “Generate” and then click the “Generate” button to create the shared secret.
4. Copy the shared secret to a text file for later use, then click OK

5. Click “Policies”, right-click on “Network Policies” and choose “New”
6. Choose a name for the SuperUser policy like “JunOS SuperUser”
7. The type of network access server should be “Unspecified”
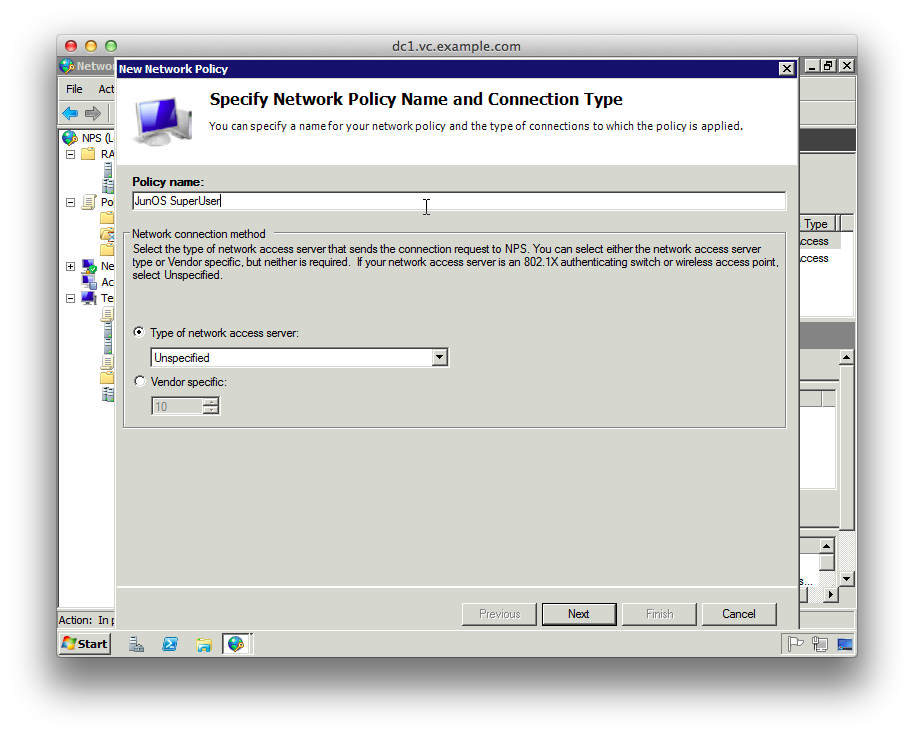
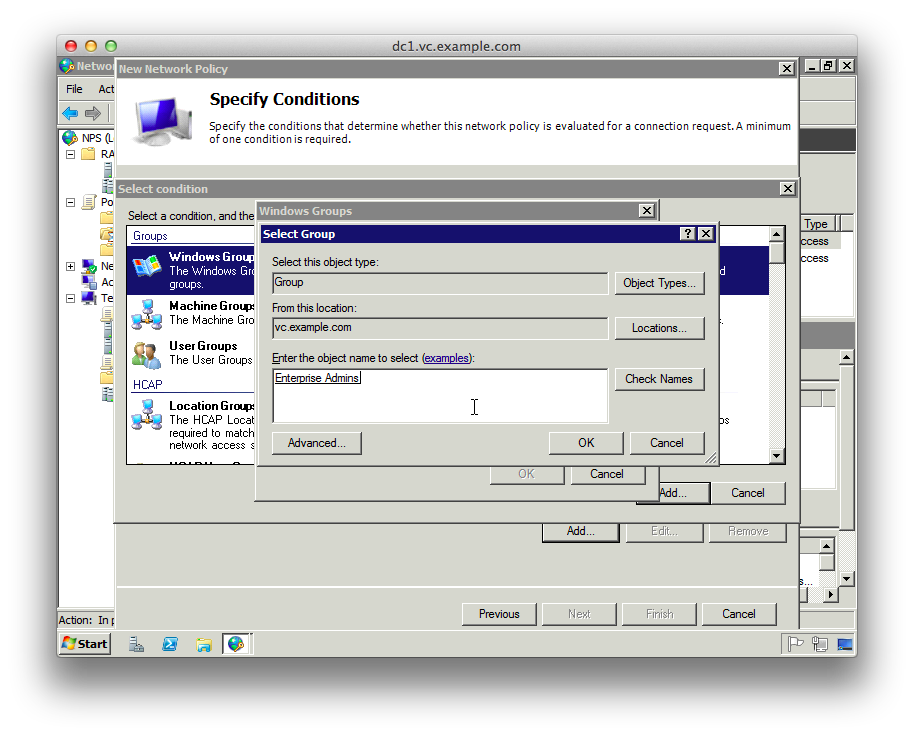
8. Add a new “Condition” matching “Windows Groups” and add the groups from AD that should have SuperUser access
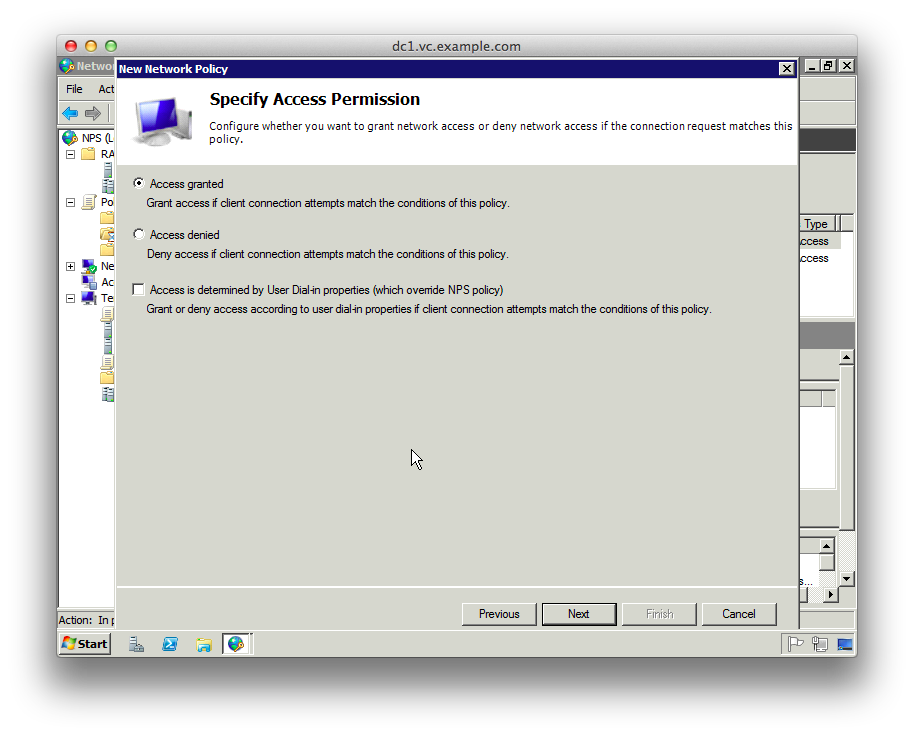
9. On the “Specify Access Permission” page leave “Access granted” selected
10. On the “Configure Authentication Methods” page unselect everything except “Microsoft Encrpyted Authentication version 2 (MS-CHAP-v2)
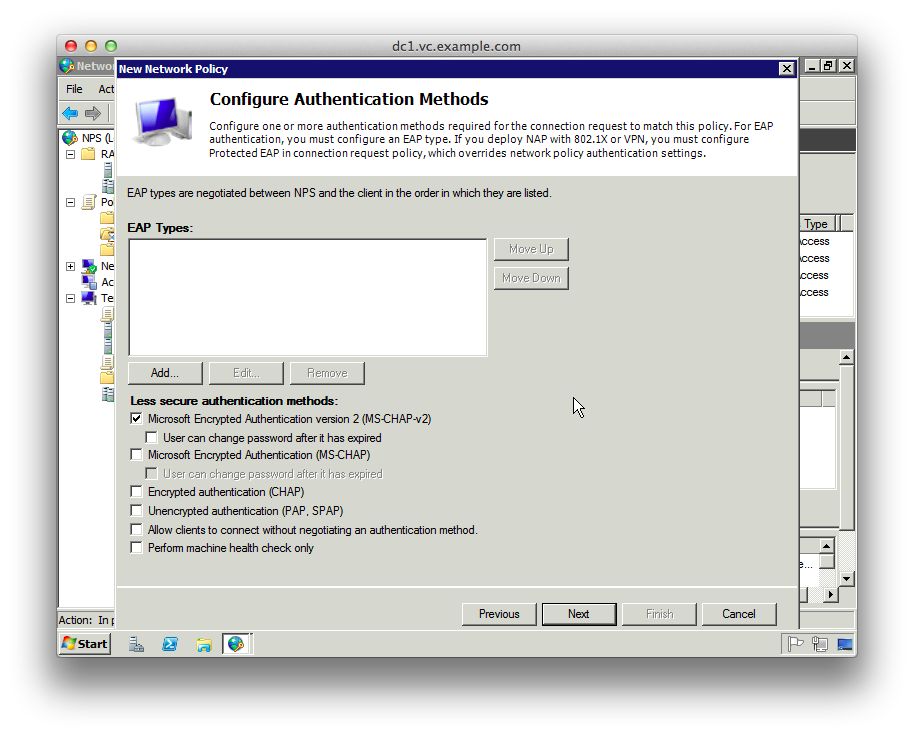
11. On the “Configure Constraints” page there are no changes.
12. On the “Configure Settings” page delete the “Standard” RADIUS attributes
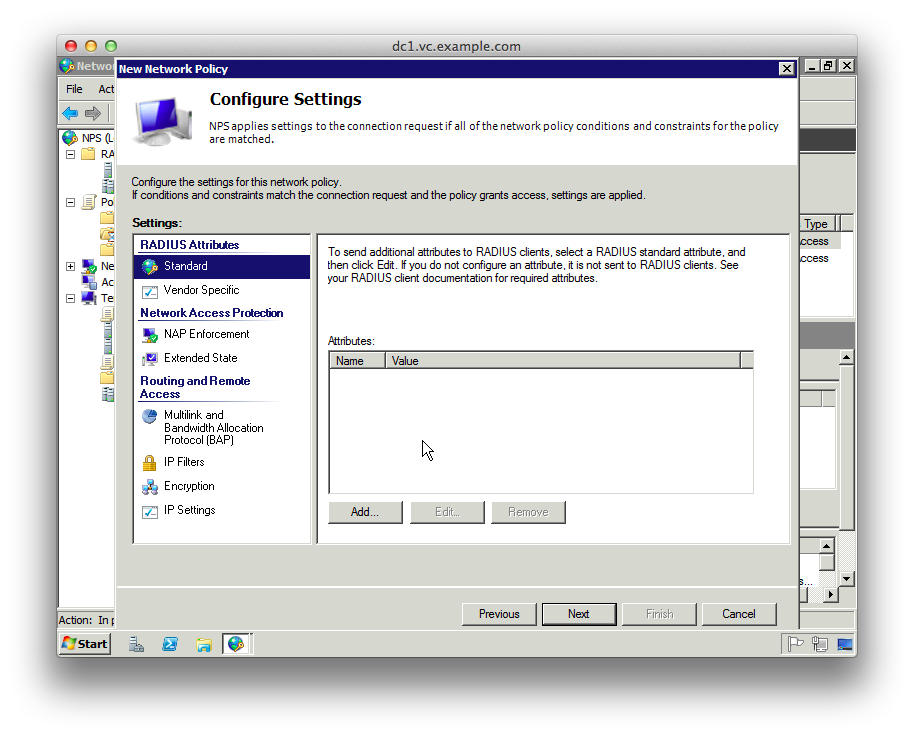
13. Select “Vendor Specific” under the RADIUS Attributes
14. Click Add, change the Vendor dropdown to “Custom” and click “Vendor-Specific” from the attributes
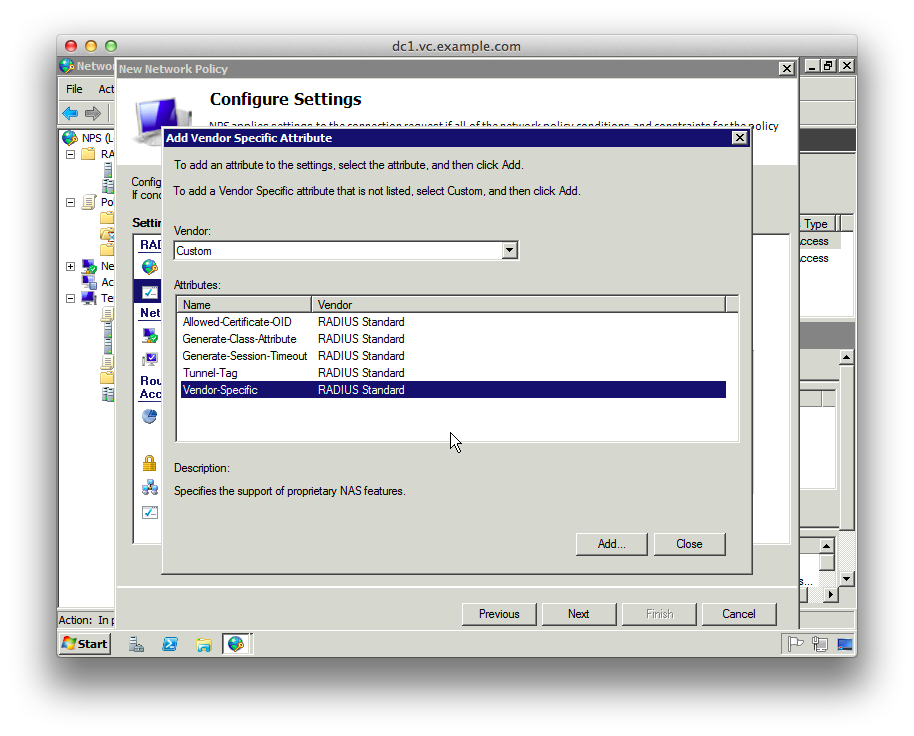
15. Click “Add”, then “Add” on the “Attribute Information” dialog
16. Select “Enter Vendor Code” from the “Specify network access server vendor” section and enter the Juniper vendor code “2636”
17. Select “Yes. It conforms” to specify that the attribute conforms to the RADIUS RFC
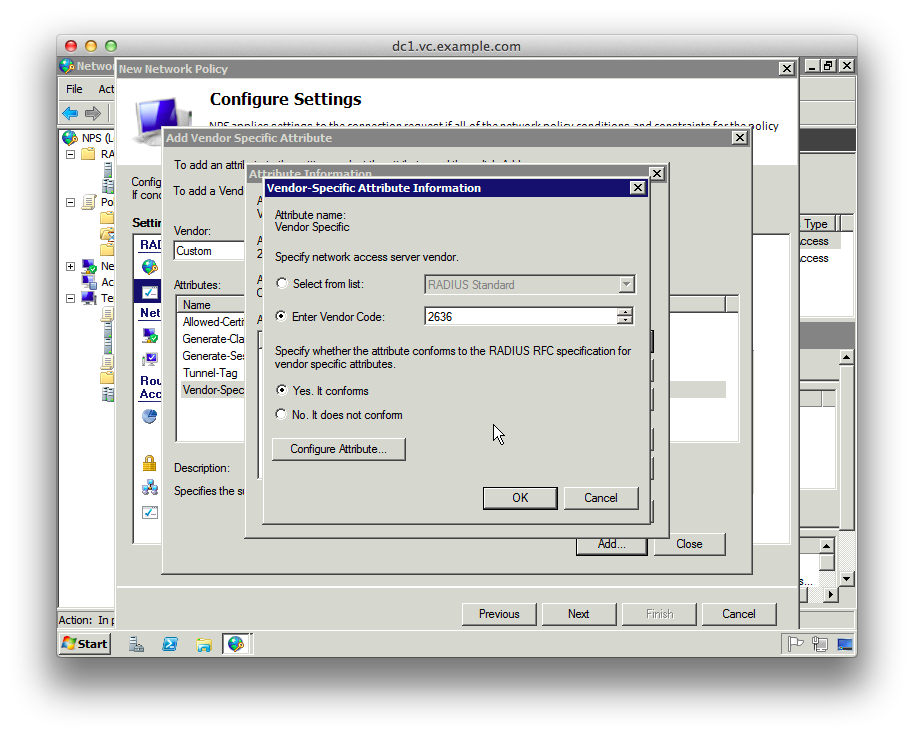
18. Click “Configure Attribute” and set the “Vendor-assigned attribute number” to “1”, which represents “Juniper-Local-User-Name”
19. Set the “Attribute format” to “String”
20. Set the “Attribute value” to “su”. This is the local username passed to JunOS
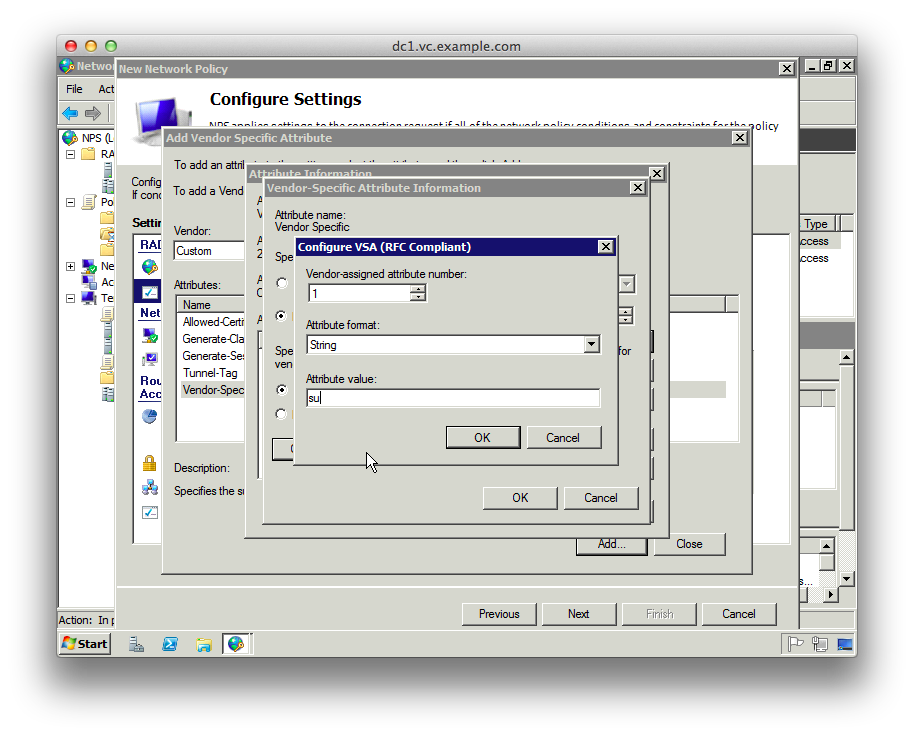
21. Click OK buttons to get back to the “Configure Settings” screen, and select “Encryption”
22. Unselect everything except “Strongest Encryption”
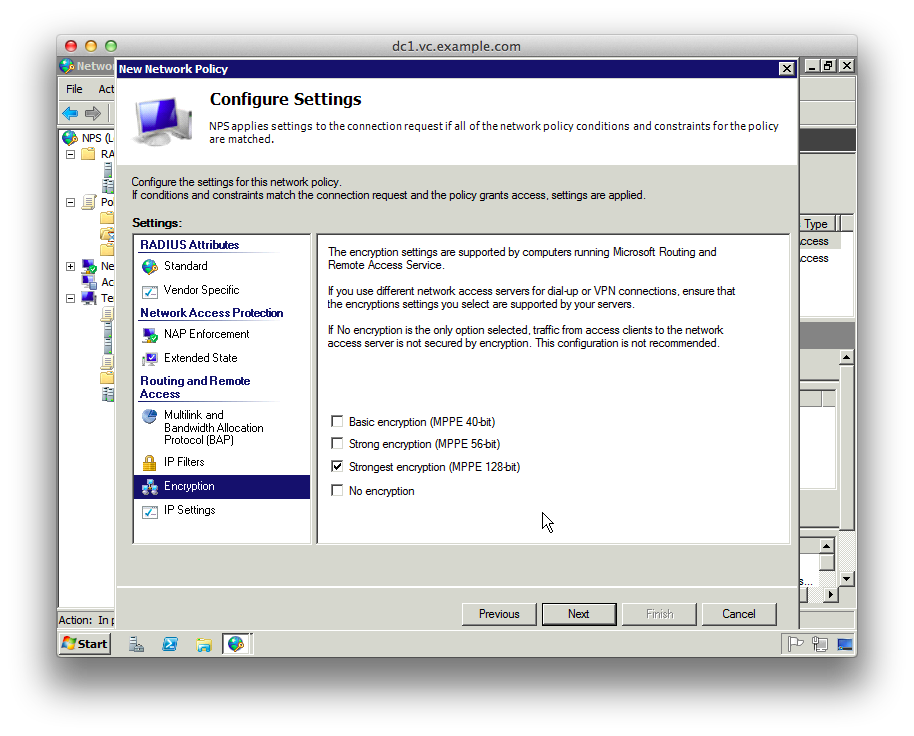
23. Click “Next”, then “Finish”
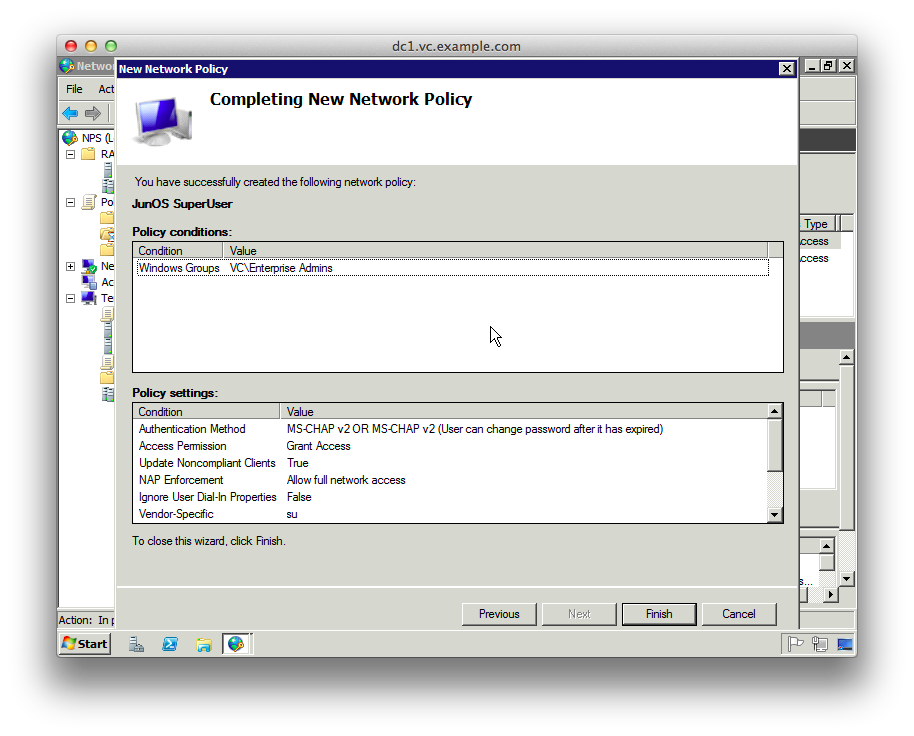
24. Repeat instructions 5-23 for the “JunOS ReadOnly profile”, setting the RADIUS attribute value to “ro” to match the JunOS config below.
25. Make sure the order of the Policies is as in the next screenshot
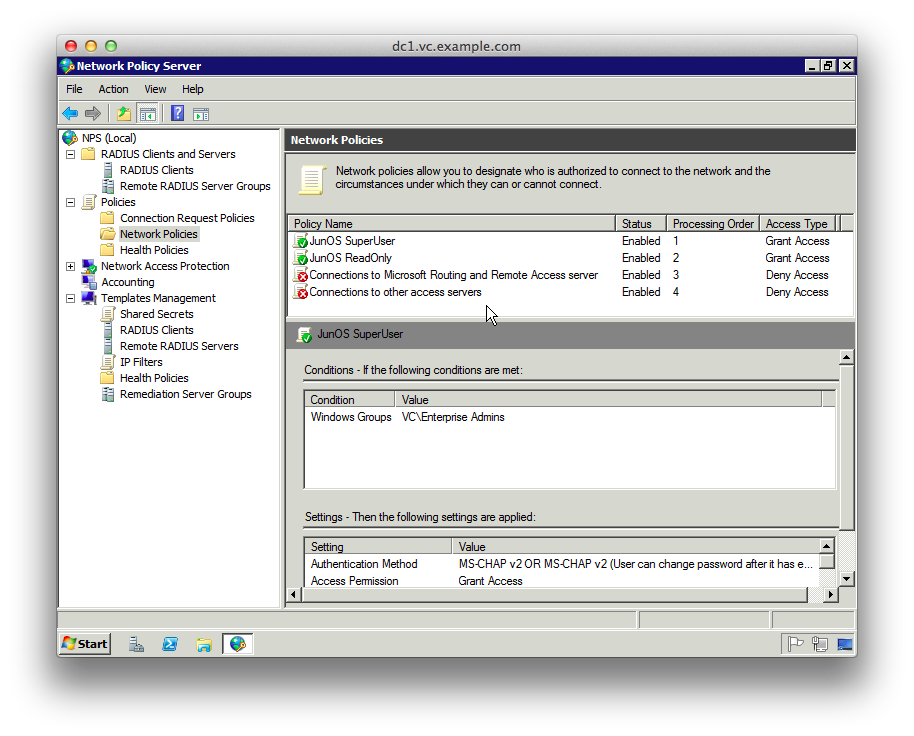
26. Expand “RADIUS Clients and Servers”, right-click “RADIUS Clients” and click “New”
27. Enter the details of the JunOS router, selecting “JunOS” from the Shared Secrets template dropdown
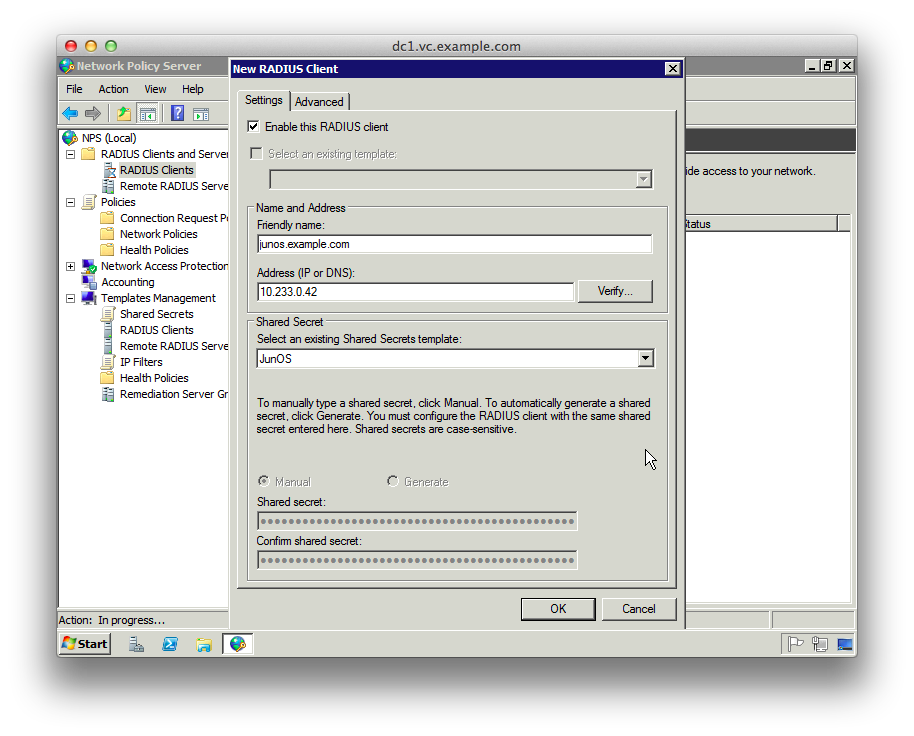
28. Click “OK”
The JunOS bit (router IP address 10.233.0.42), add this configuration changing the secret key that Windows created. This sets up two user ‘roles’ – ‘ro’ and ‘su’ and configures the radius server shared secret.
set system authentication-order [ password radius ]
set system radius-server 10.233.0.52 secret "0C&2eTVBv8SMXwq1eo5!3fyBhh!u2gcBjGLcz@jIC4LPj8slrBC9V^j&0hMXUHRe"
set system radius-options password-protocol mschap-v2
set system login user ro class read-only
set system login user su class super-user
set system services ssh
Then “show | compare” should look something like this:
[edit system]
+  authentication-order [ password radius ];
+  radius-server {
+      10.233.0.52 secret "$9$pml/uIEyrKx7-yrWx7-Y2F36CAuEcleWLUj3/9t1IwYgoUHqmf3nCHqBIEhyr24oZUHz39tpOikz69CpuxNdw4aHkPQz6CtclM8N-ZGDkqfCtOB1EfTAu1ISy24oaUiHqPTz6f5RSyKx7jHqPfQn6CtO1Vw9t01yr8Xx7bsGUHfTFKMGjiq5TREcylM"; ## SECRET-DATA
+  }
+  radius-options {
+      password-protocol mschap-v2;
+  }
+  login {
+      user ro {
+          class read-only;
+      }
+      user su {
+          class super-user;
+      }
+  }
[edit system services]
+    ssh;

[edit]
After ‘commit’, JunOS will start the SSH daemon. If everything worked, then you can log in as any AD user that’s in the groups selected above:
Superuser group:
macbook:/Users/chrisl/ 12$ ssh chrisl@junos
chrisl@junos's password:
--- JUNOS 10.1R1.8 built 2010-02-12 17:15:05 UTC
chrisl@junos> configure
Entering configuration mode

[edit]
chrisl@junos#
Readonly group:
macbook:/Users/chrisl/ 13$ ssh hermioneg@junos
hermioneg@junos's password:
--- JUNOS 10.1R1.8 built 2010-02-12 17:15:05 UTC
hermioneg@junos> conf
                 ^
unknown command.

hermioneg@junos>
Comments
thank you sir! Very nice article that helped me out a lot.
Brilliant. Thanks for the easy instructions. Not everyone shows screenshots 🙂
I tried every single tutorial on the internet to get my SRX to work with radius with no luck. This is the only method that worked!
Thank you very much for this article.- Pingback: David Piniella | Domain Authentication against AD
Thanks a lot 🙂
I’m following the article but device cannot authenticate with AD


